Advertisement
Google Ad Slot: content-top
Spring Boot Installation Guide on Windows
This guide explains how to set up a complete Java Spring Boot development environment on Windows.
Part 1: Install Java JDK
Java JDK is required to develop and run Java applications for Spring Boot development, you need a JDK, not just a JRE.
Step 1: Download Java JDK
You can download Java from the official Oracle website:
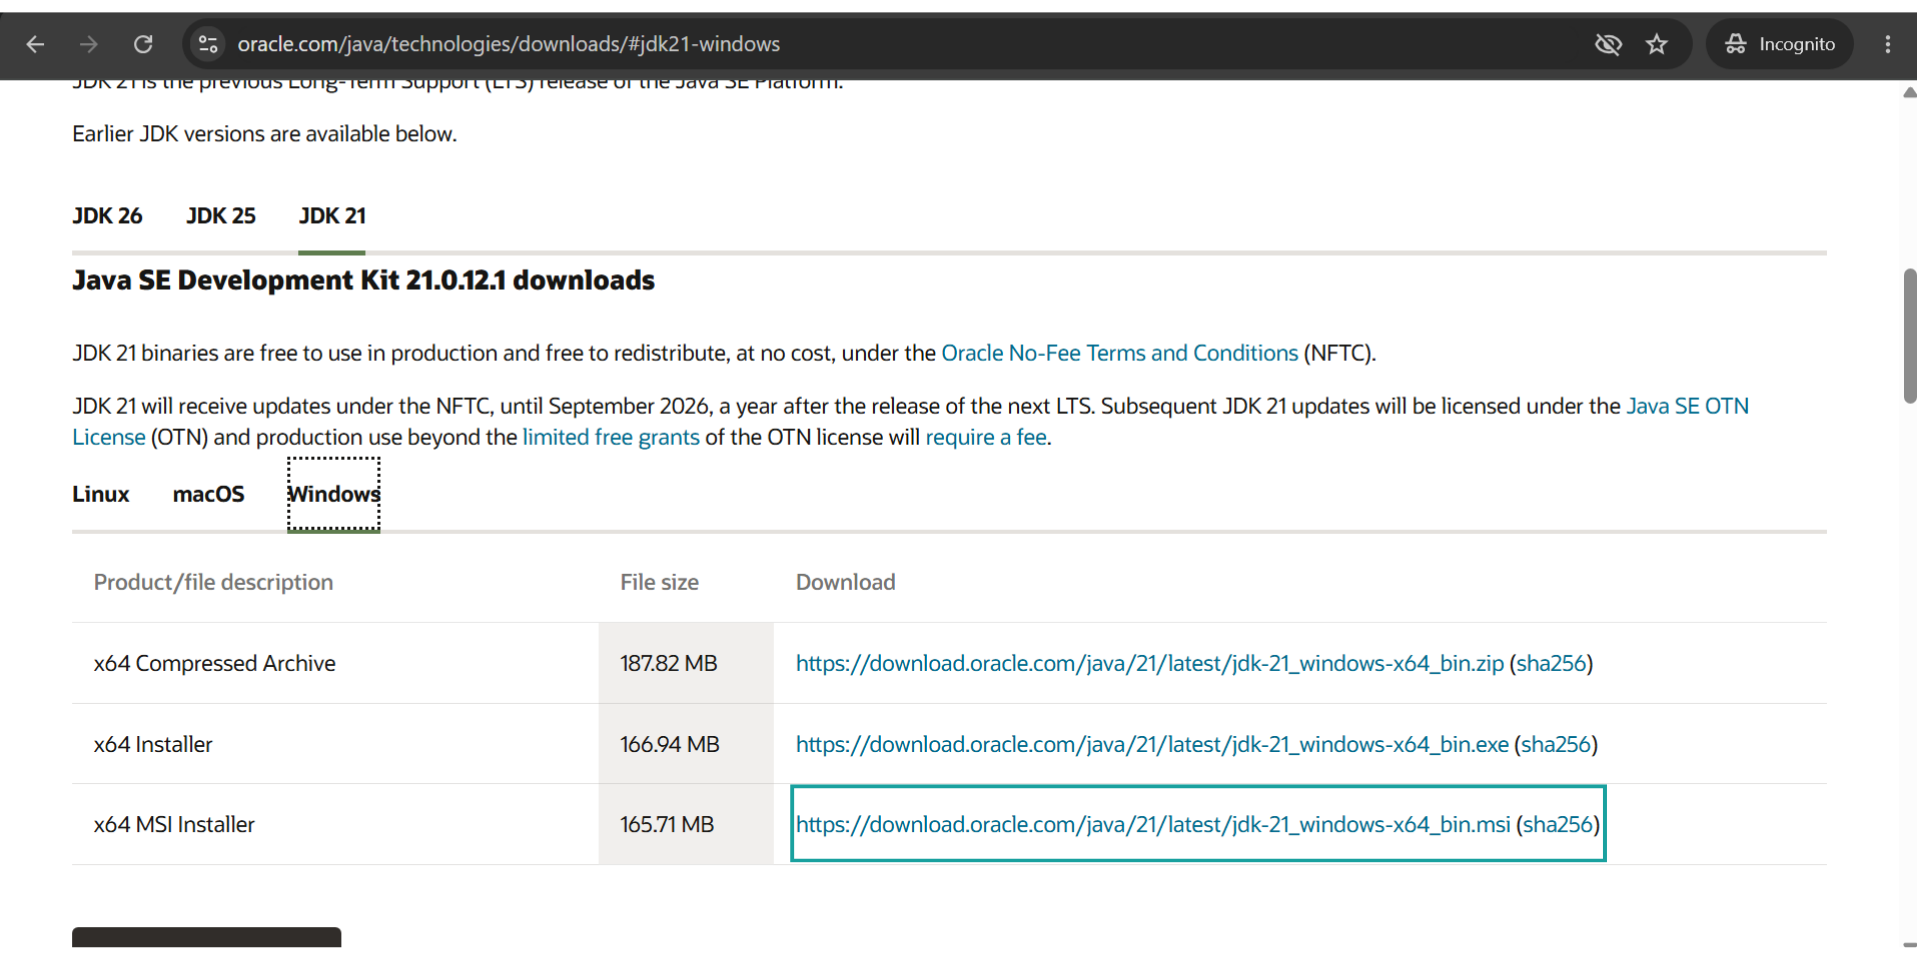
Download the JDK installer and wait for the download to complete.
Step 2: Install Java JDK
Open the downloaded Java installer.
Follow the installation steps.
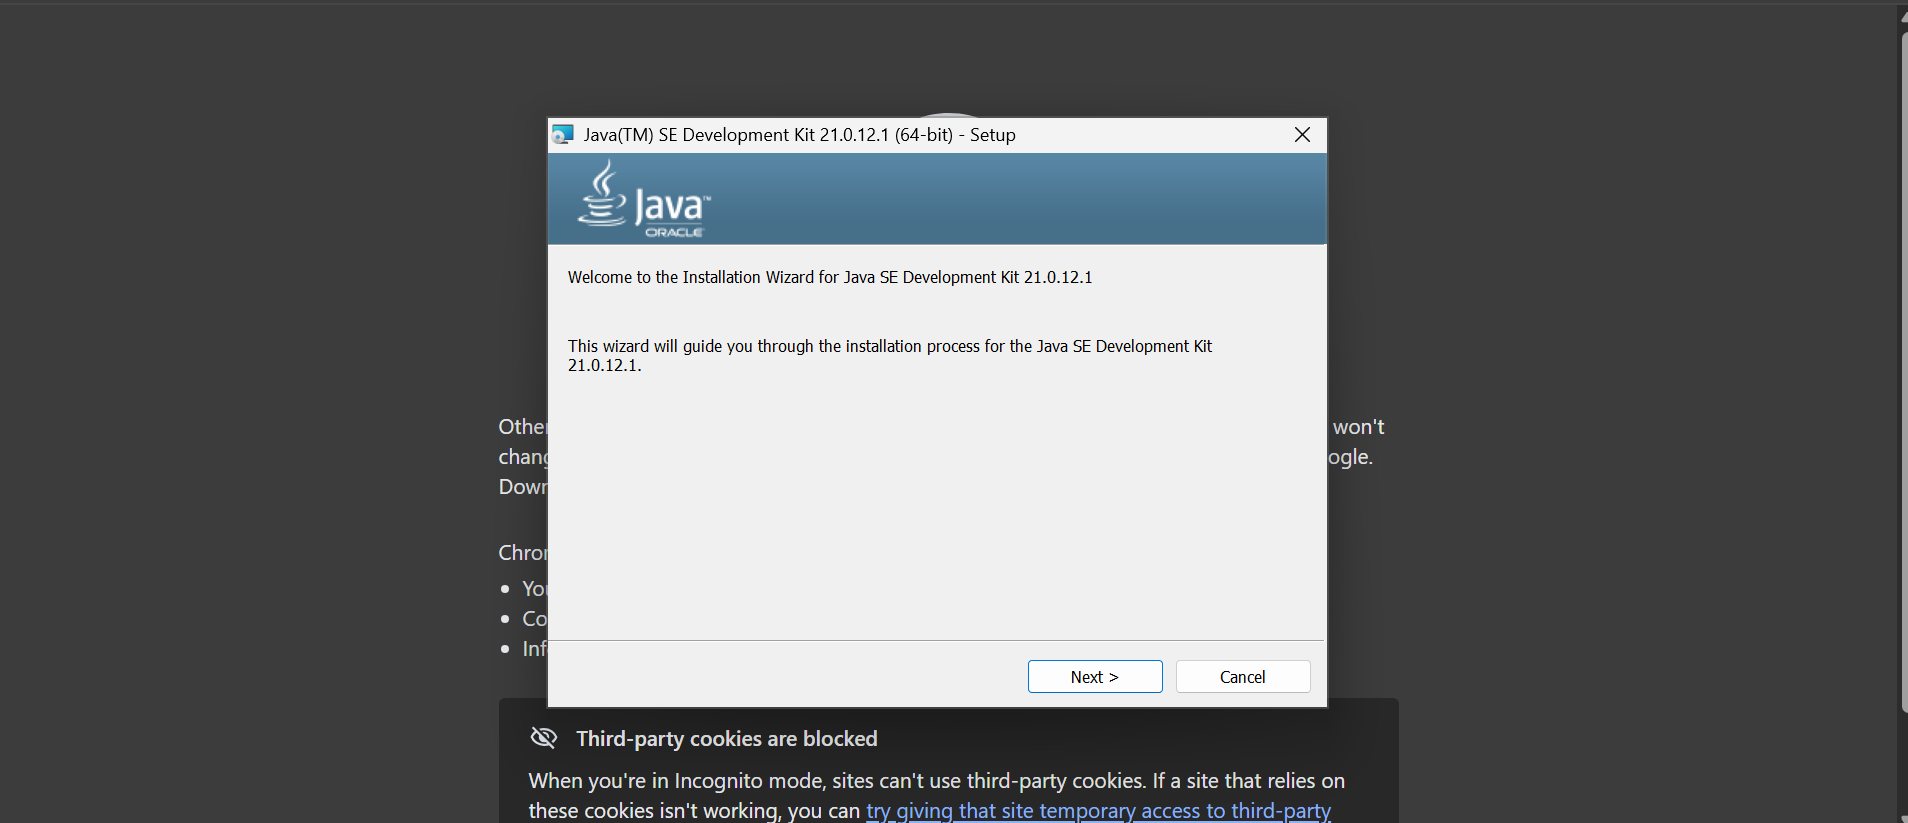
Click Next.
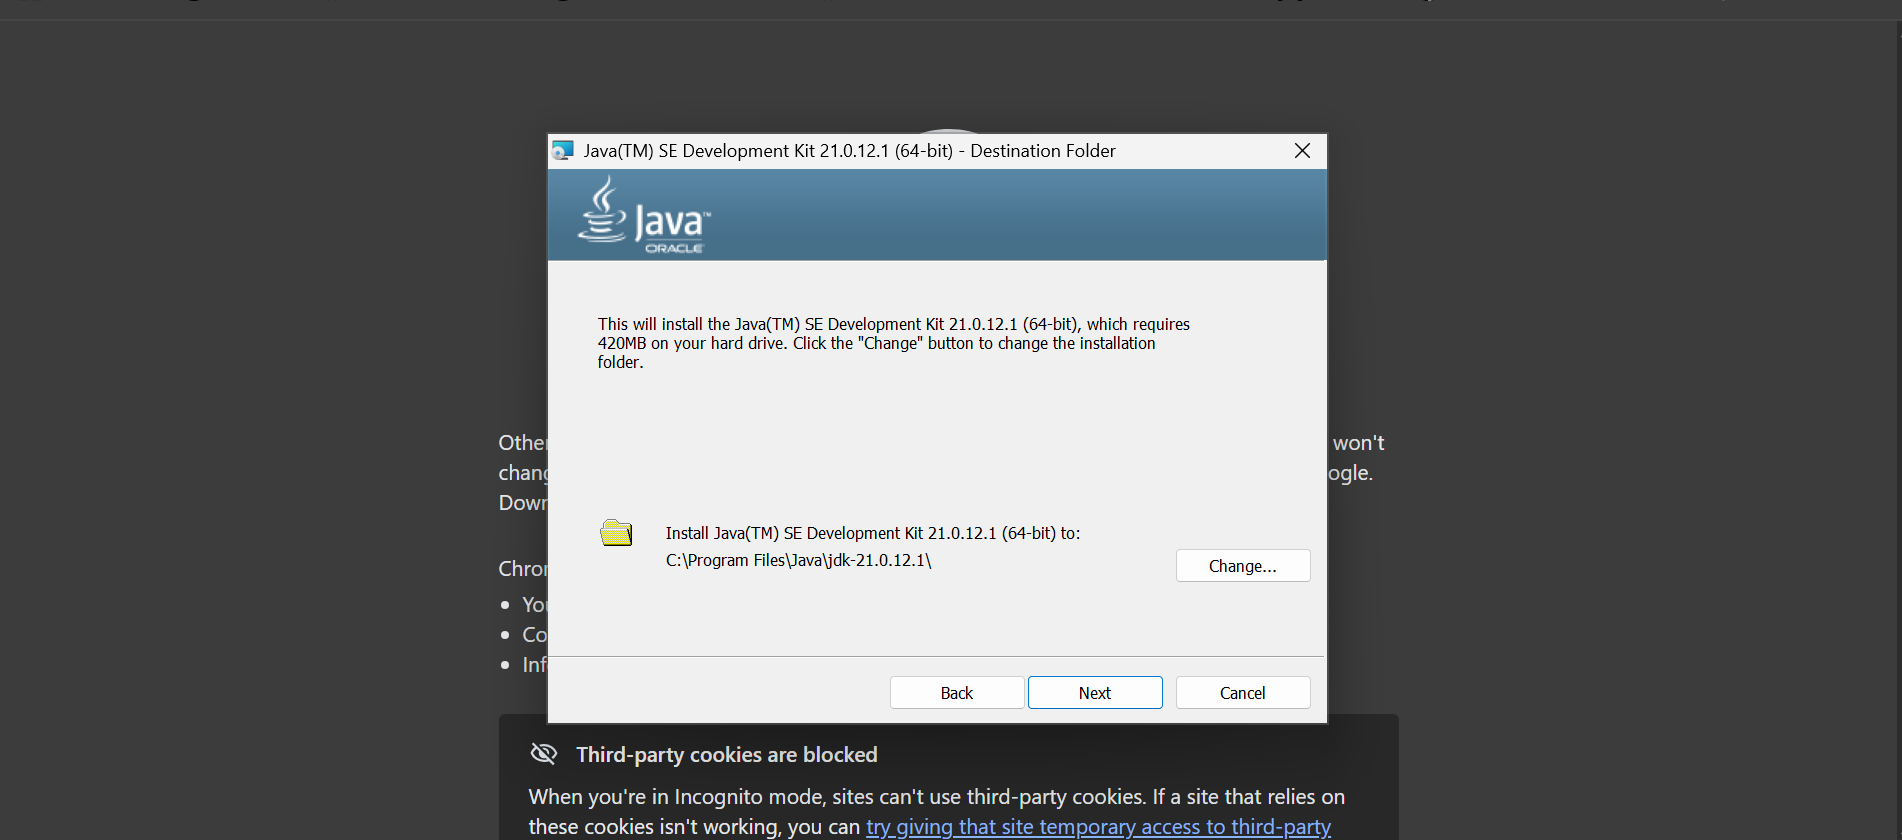
Click Next.
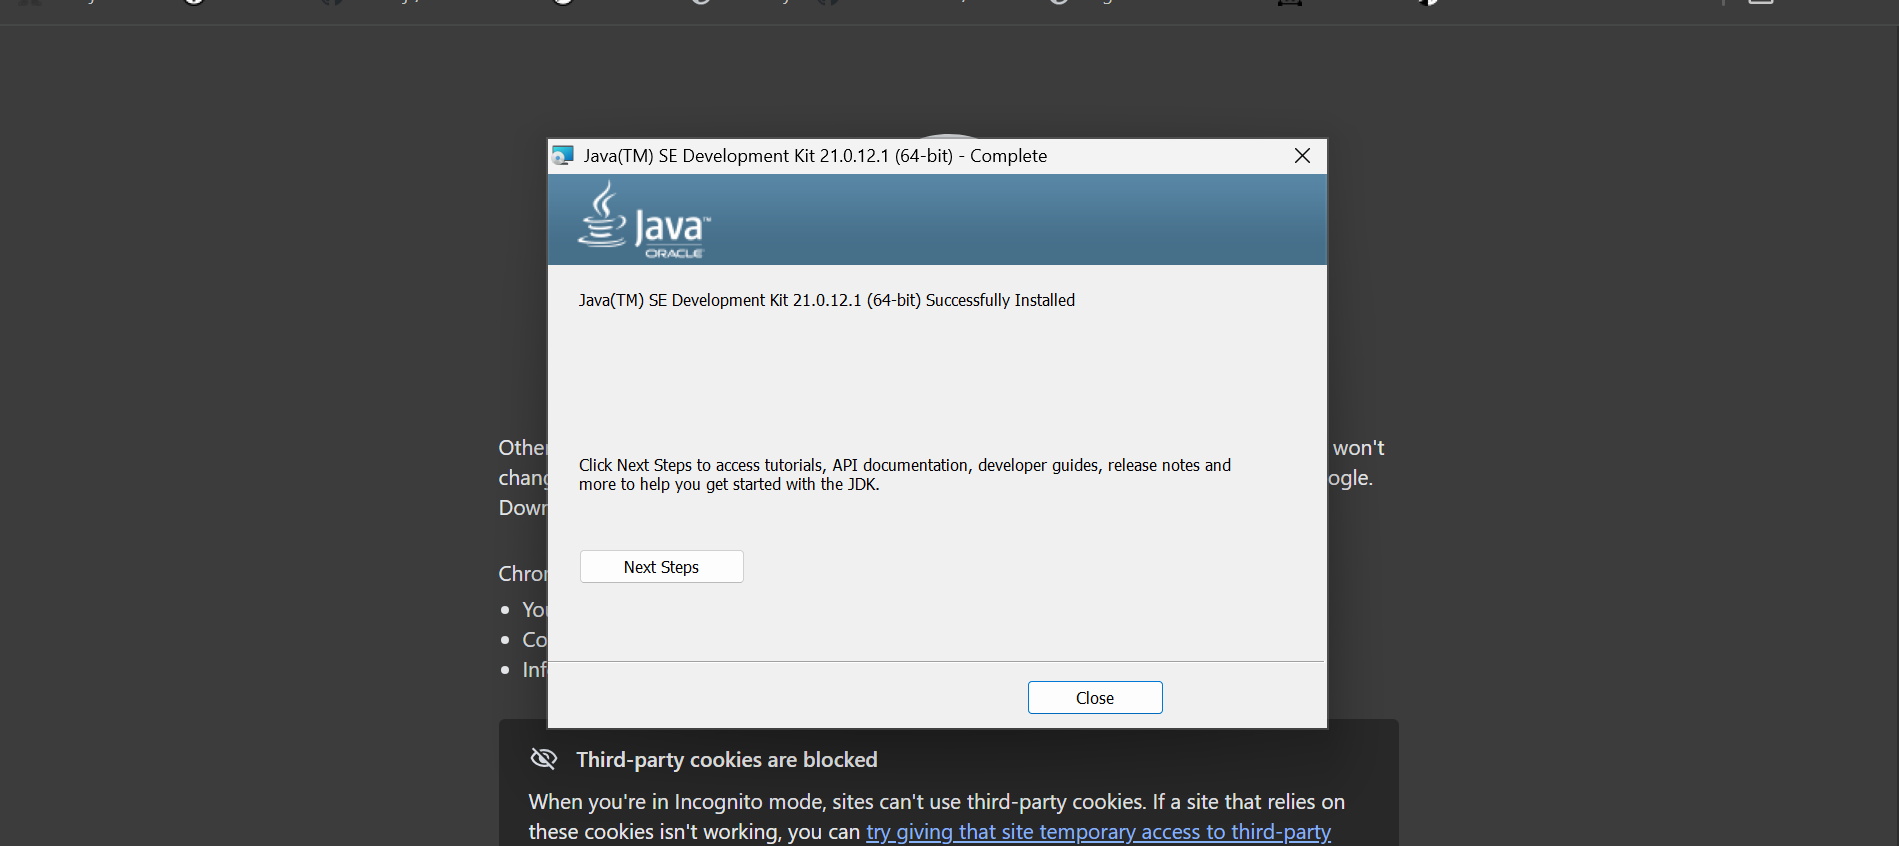
Click Next.
Part 2: Configure JAVA_HOME
JAVA_HOME is an environment variable that points to your JDK installation directory.
Many Java tools such as Maven and Gradle use JAVA_HOME.
Step 2: Open Environment Variables
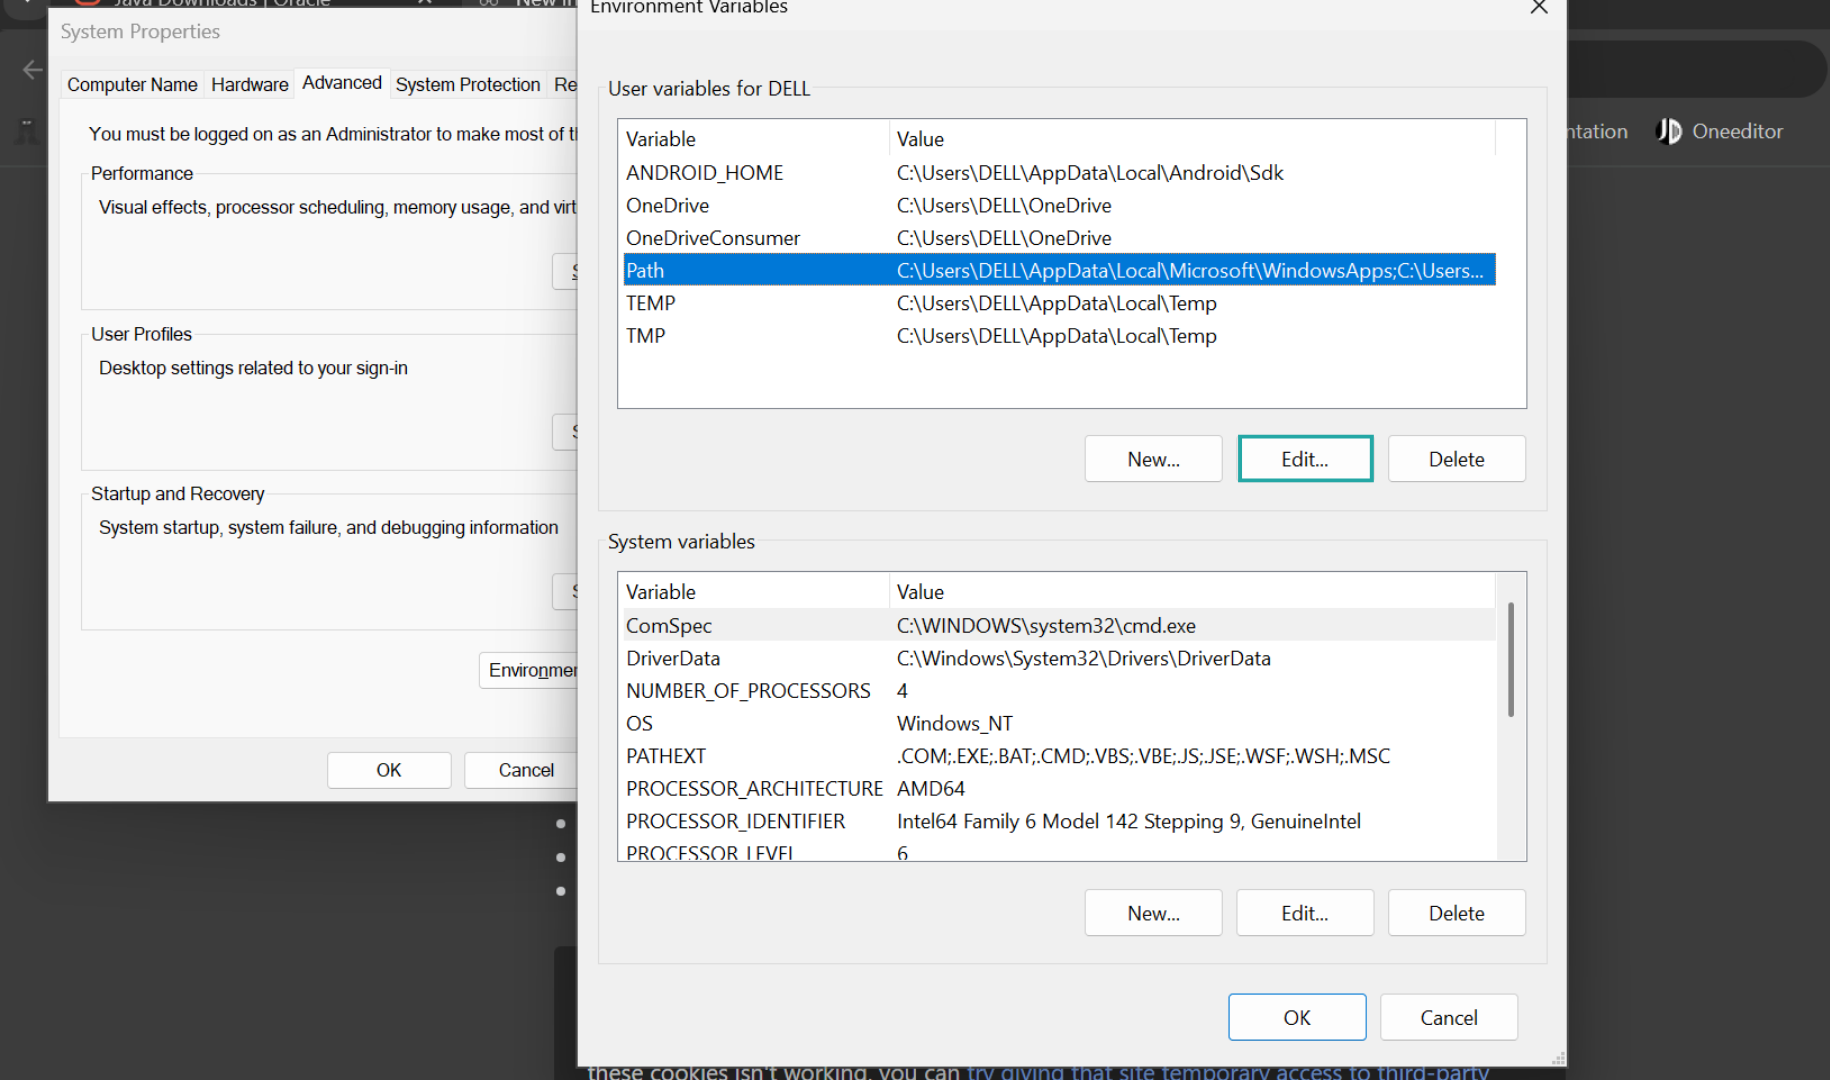
Open Windows Search and search for: Environmental variable.Select Edit the system environment variables Then click:
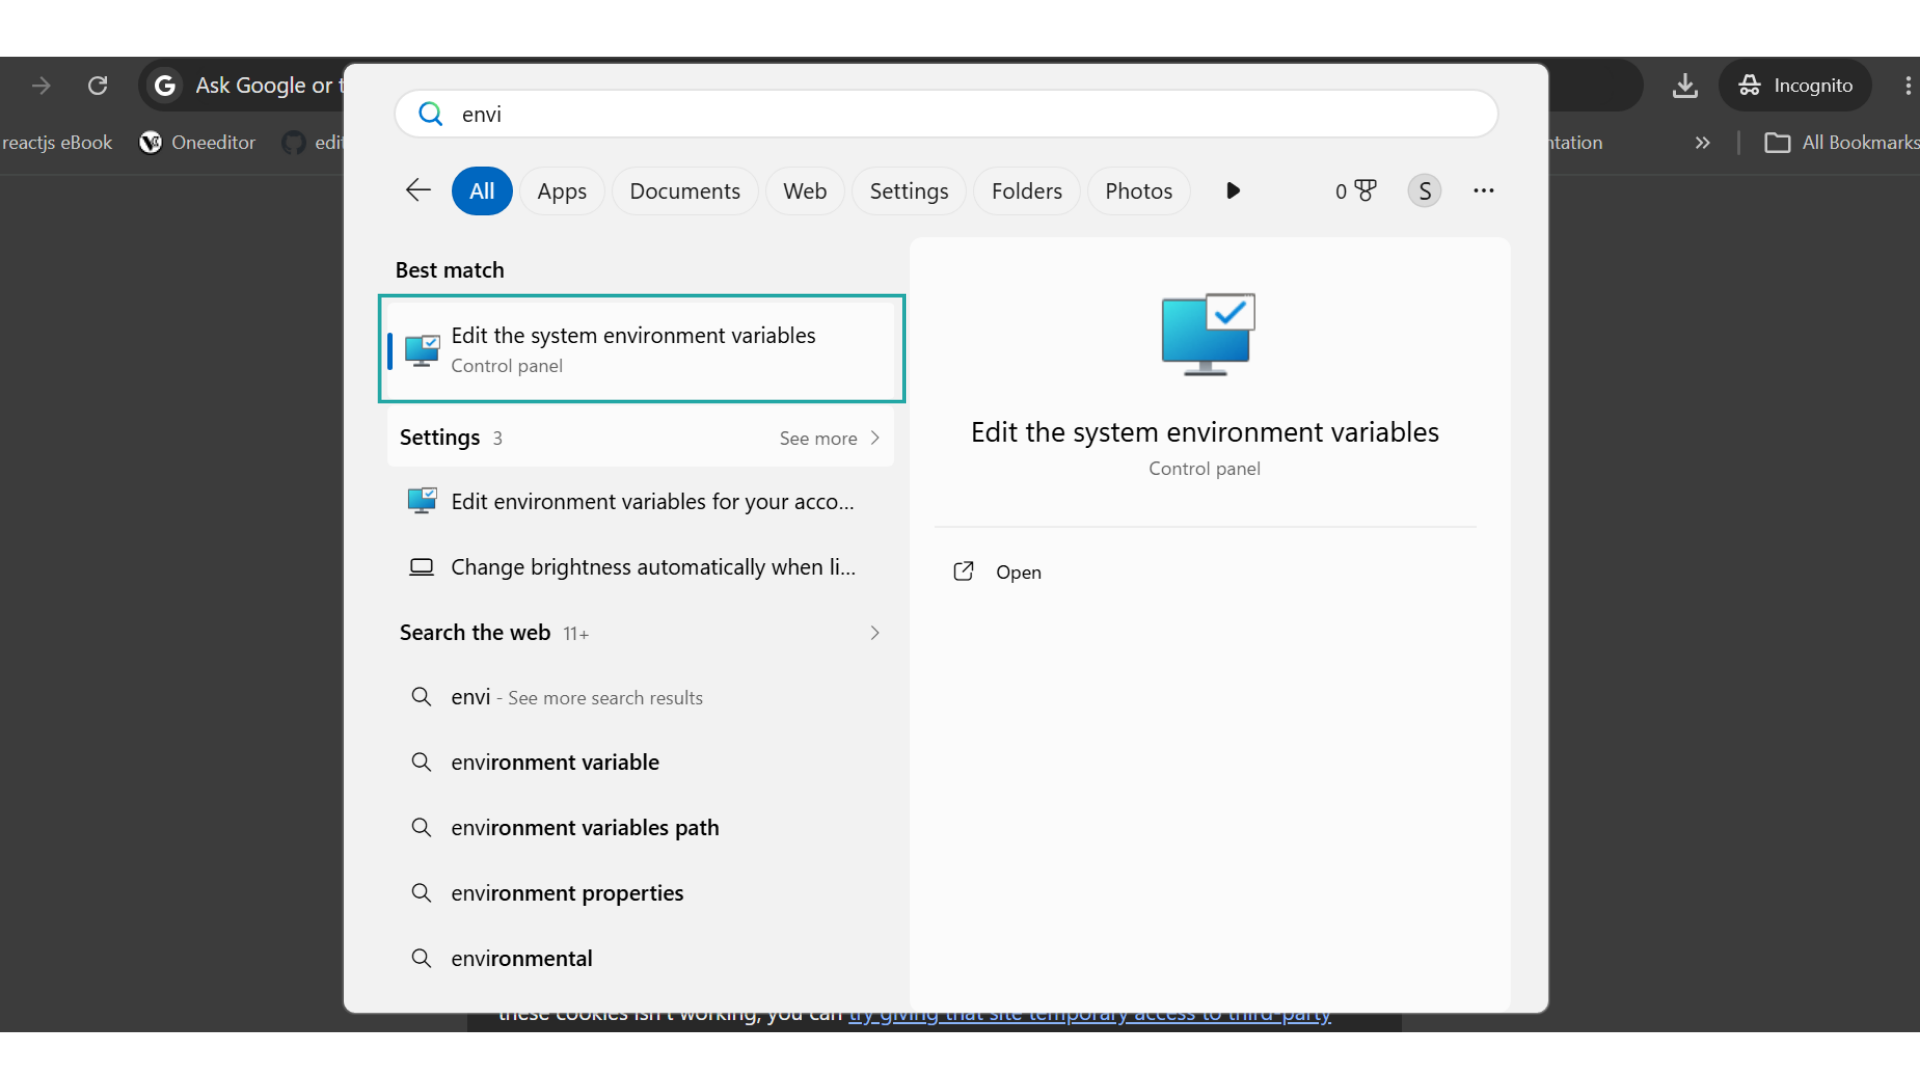
Select Environmental Variable
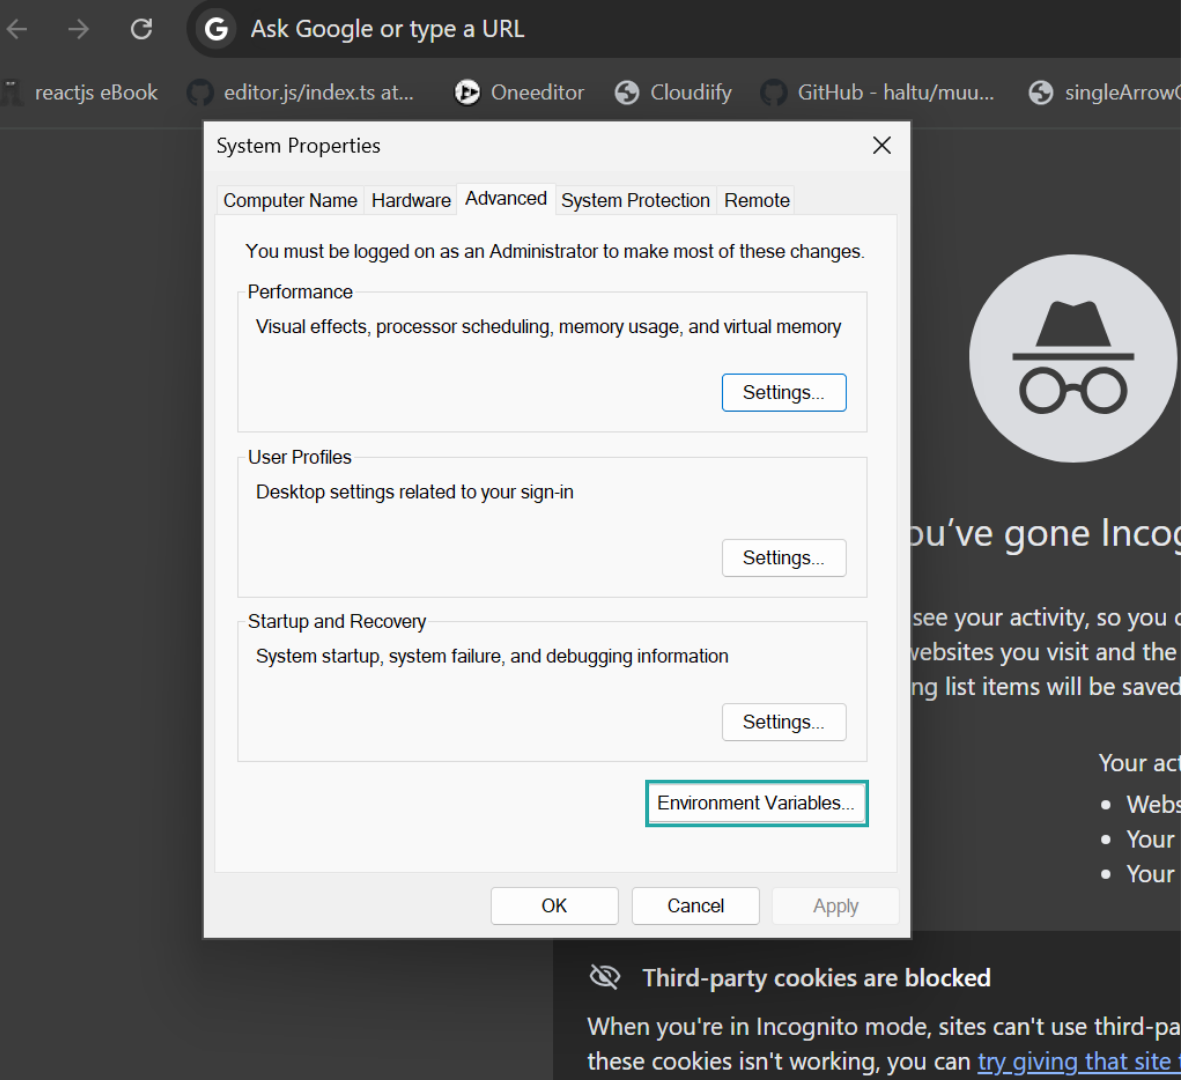
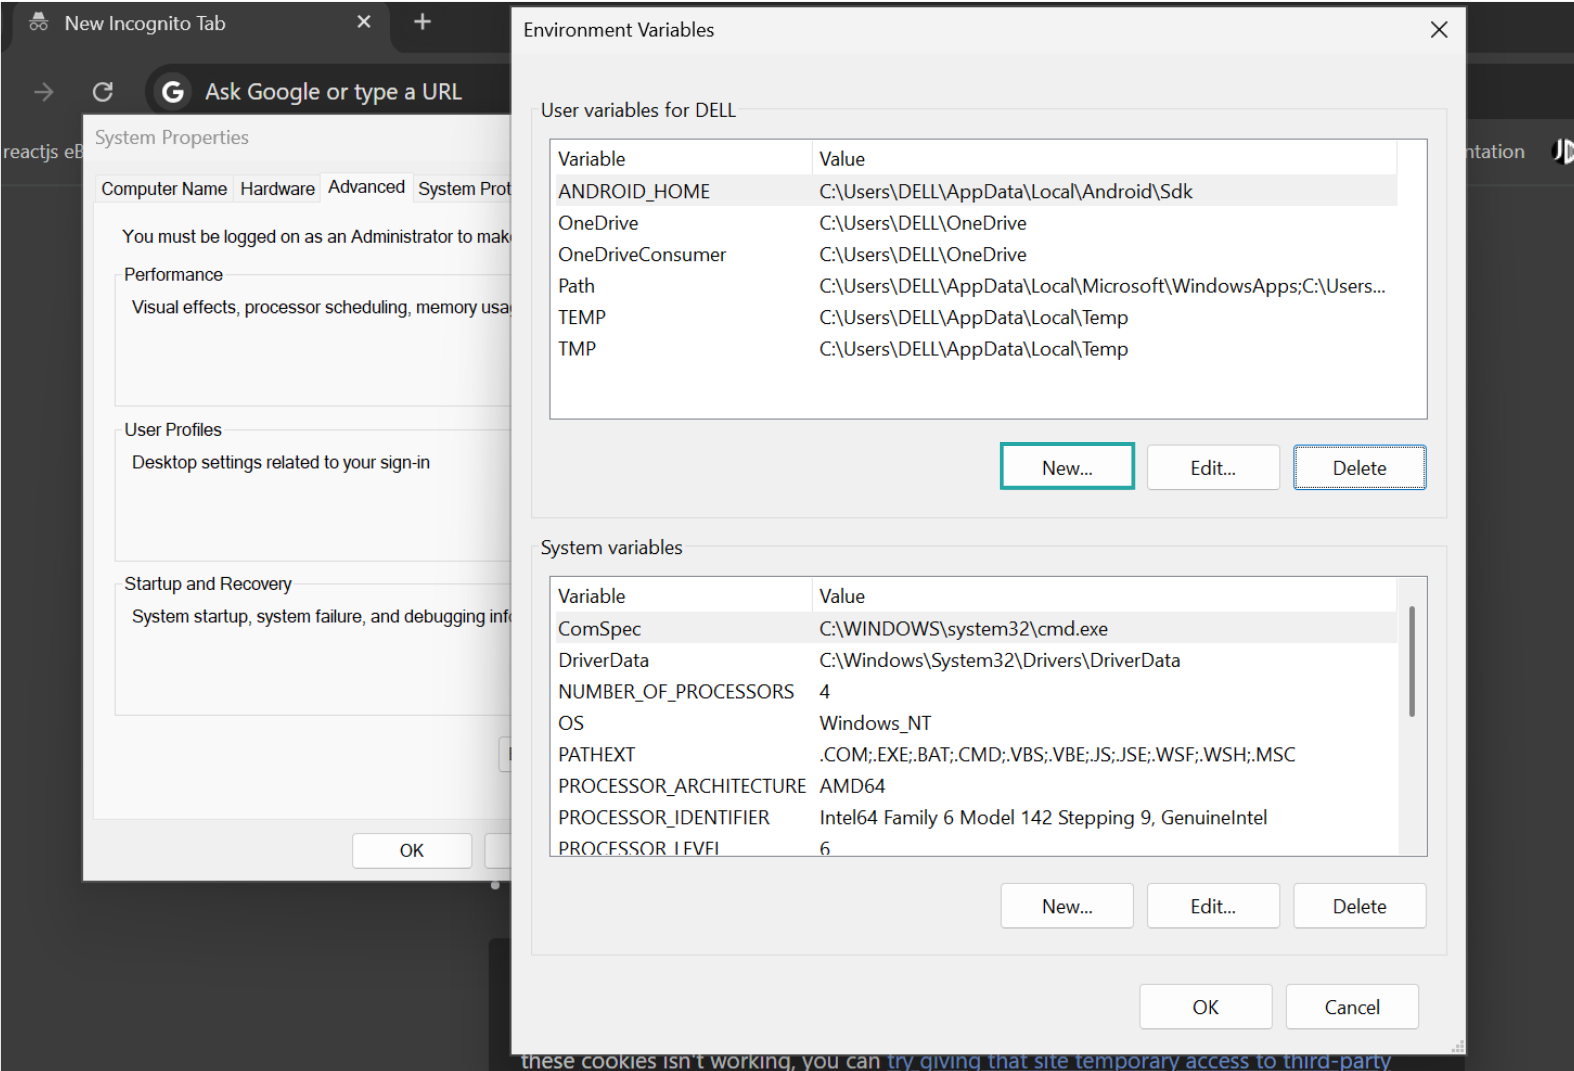
Click New
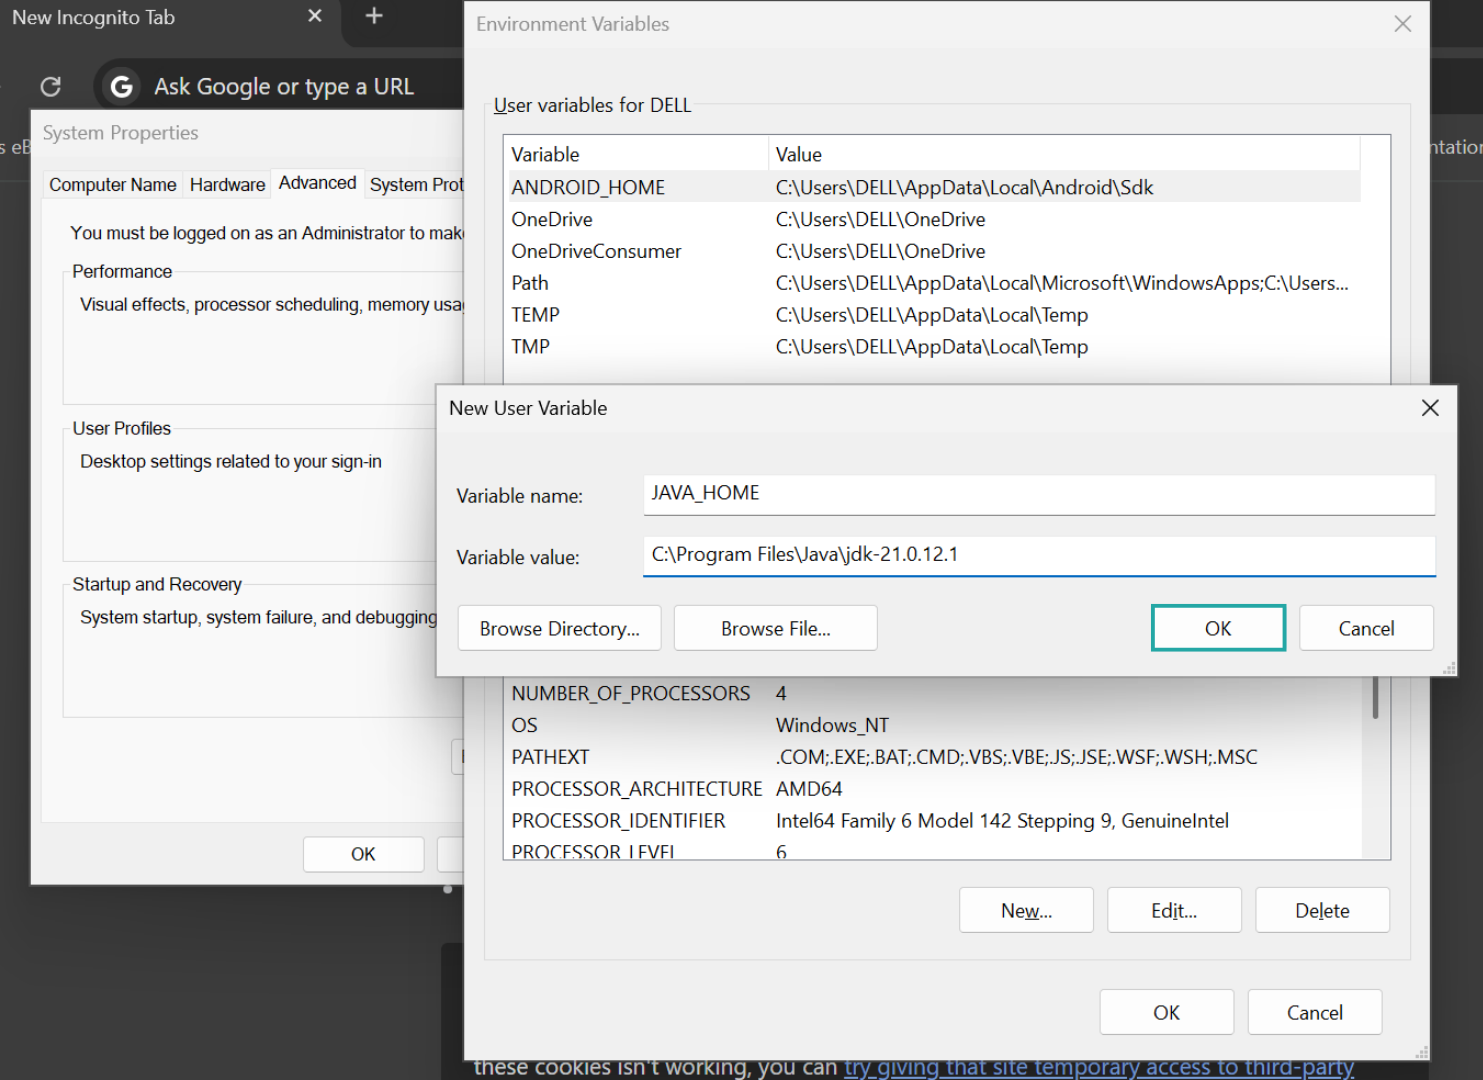
Update Variable is JAVA_HOME and Value is C:\Program Files\Java\jdk-21.0.12.1 and Click Ok
Select Path and Click Edit
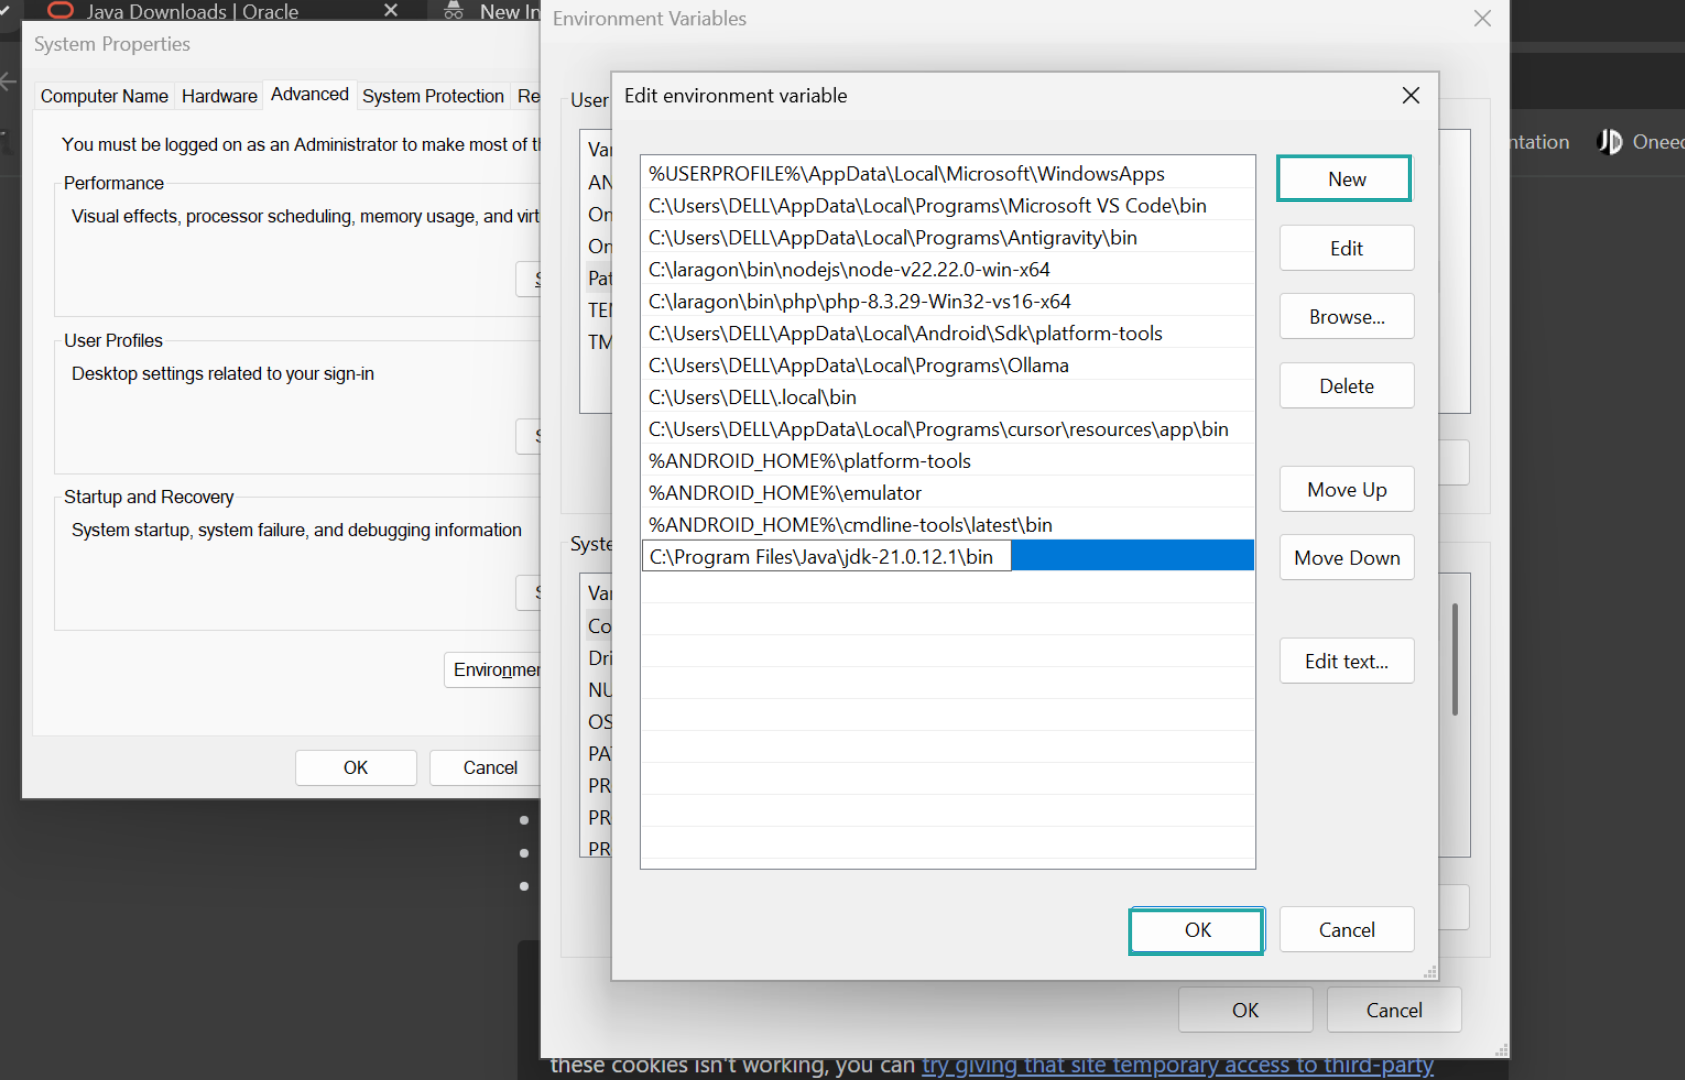
Click New ,Type path C:\Program Files\Java\jdk-21.0.12.1\bin and Click Ok
Step 5: Verify JAVA_HOME
Open a new Command Prompt.
Run:this comments
- java -version
- javac -version
- echo %JAVA_HOME%
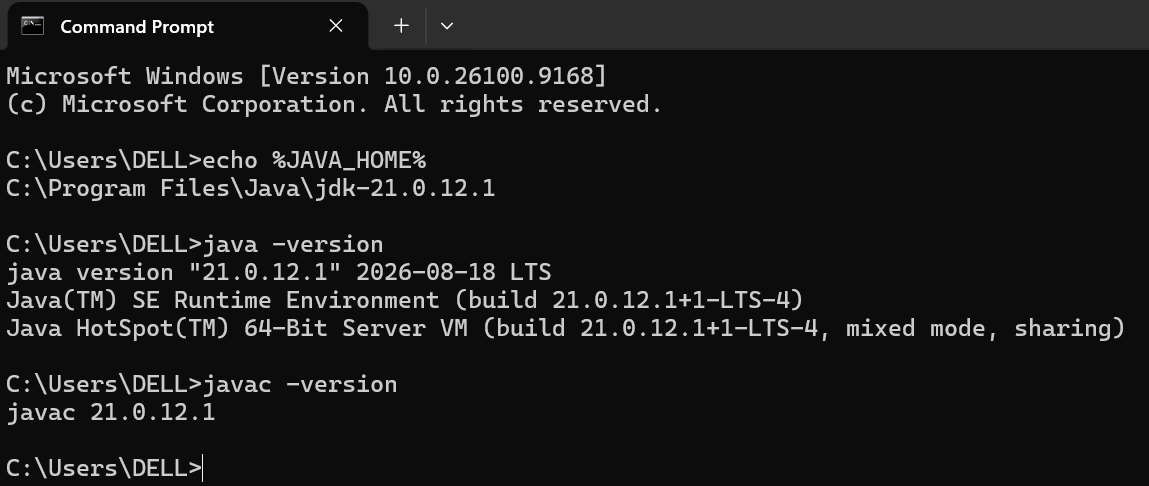
Java is now configured.
Part 3: Install IntelliJ IDEA
IntelliJ IDEA is an IDE used for Java development.
It provides features such as:
Step 1: Download IntelliJ IDEA
Download IntelliJ IDEA from the official JetBrains website:
Select the Windows version and download the installer.
Wait for the download to complete.
Step 2: Run the Installer
Open the downloaded .exe file.
The IntelliJ IDEA Setup window will appear.
You can keep the default installation location.
Step 4: Select Installation Options
The installer may provide options such as:
-
Create a desktop shortcut
-
Add the bin directory to PATH
-
Add "Open Folder as Project"
-
Associate file extensions
Part 4: Configure Java JDK in IntelliJ IDEA
After installing IntelliJ IDEA, you need to make sure your Java project uses the correct JDK.
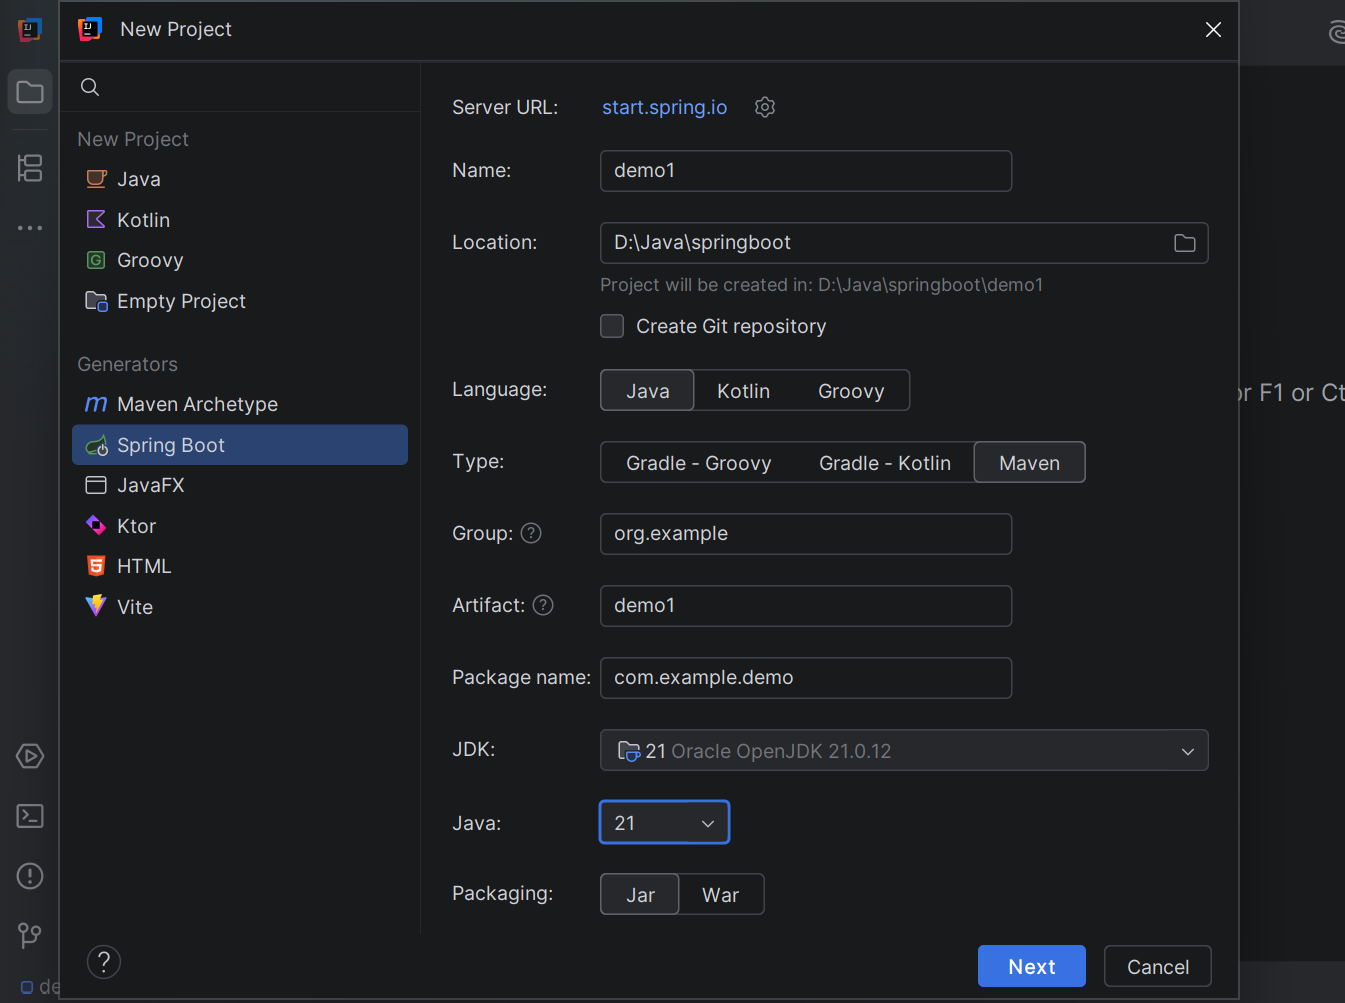
Step 2: Create a Spring Boot Application
Select New project
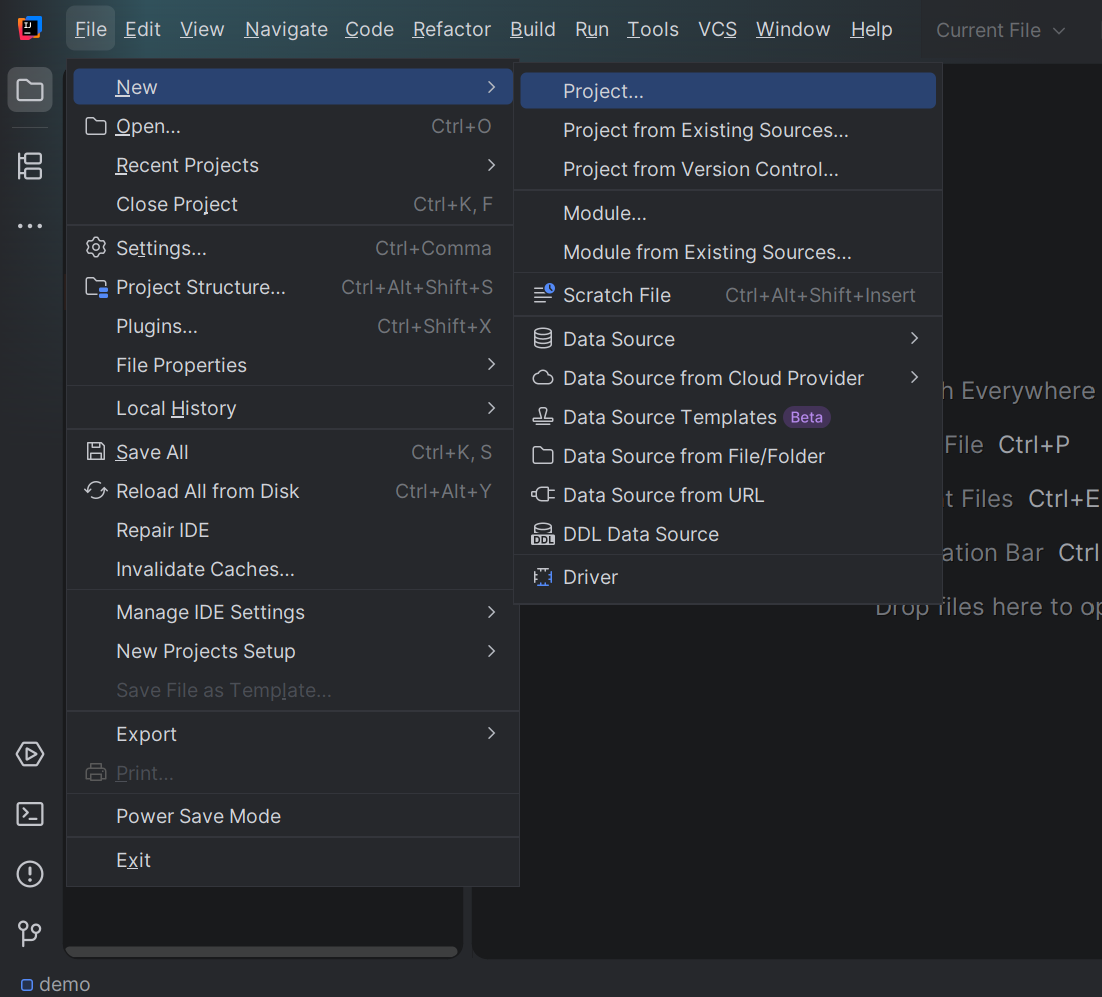
Select Spring Boot
If IntelliJ IDEA does not detect your JDK, select:
Add JDK from Disk
Then select:
C:\Program Files\Java\jdk-21
Click Next
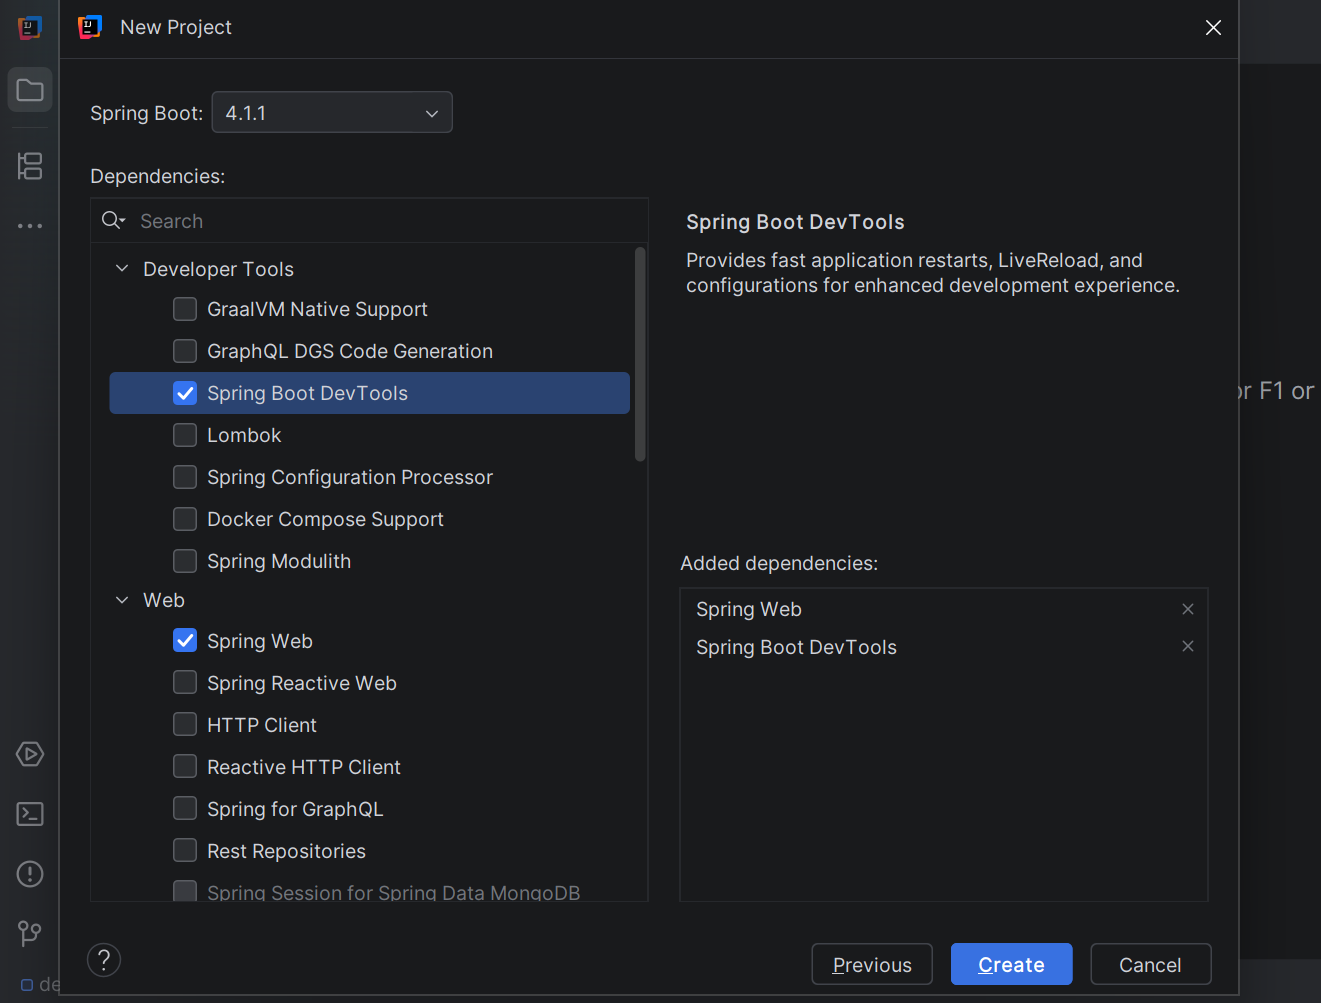
Add Spring Web and Spring Boot Dev Tools and Click Create
Your project may look like:
demo
│
├── .mvn
│
├── src
│   ├── main
│   │   ├── java
│   │   └── resources
│   │
│   └── test
│
├── mvnw
├── mvnw.cmd
├── pom.xml
└── HELP.md
Part 14: Create a Controller
Now create a simple REST API.
Inside: src/main/java/com/example/demo
package com.example.demo;

import org.springframework.web.bind.annotation.GetMapping;
import org.springframework.web.bind.annotation.RestController;

@RestController
public class HelloController {

    @GetMapping("/")
    public String home() {
        return "Hello, Spring Boot!";
    }

}
Part 16: Run the Application
Open Command Prompt inside your Spring Boot project directory.
Run : mvnw.cmd spring-boot:run
CMD Run
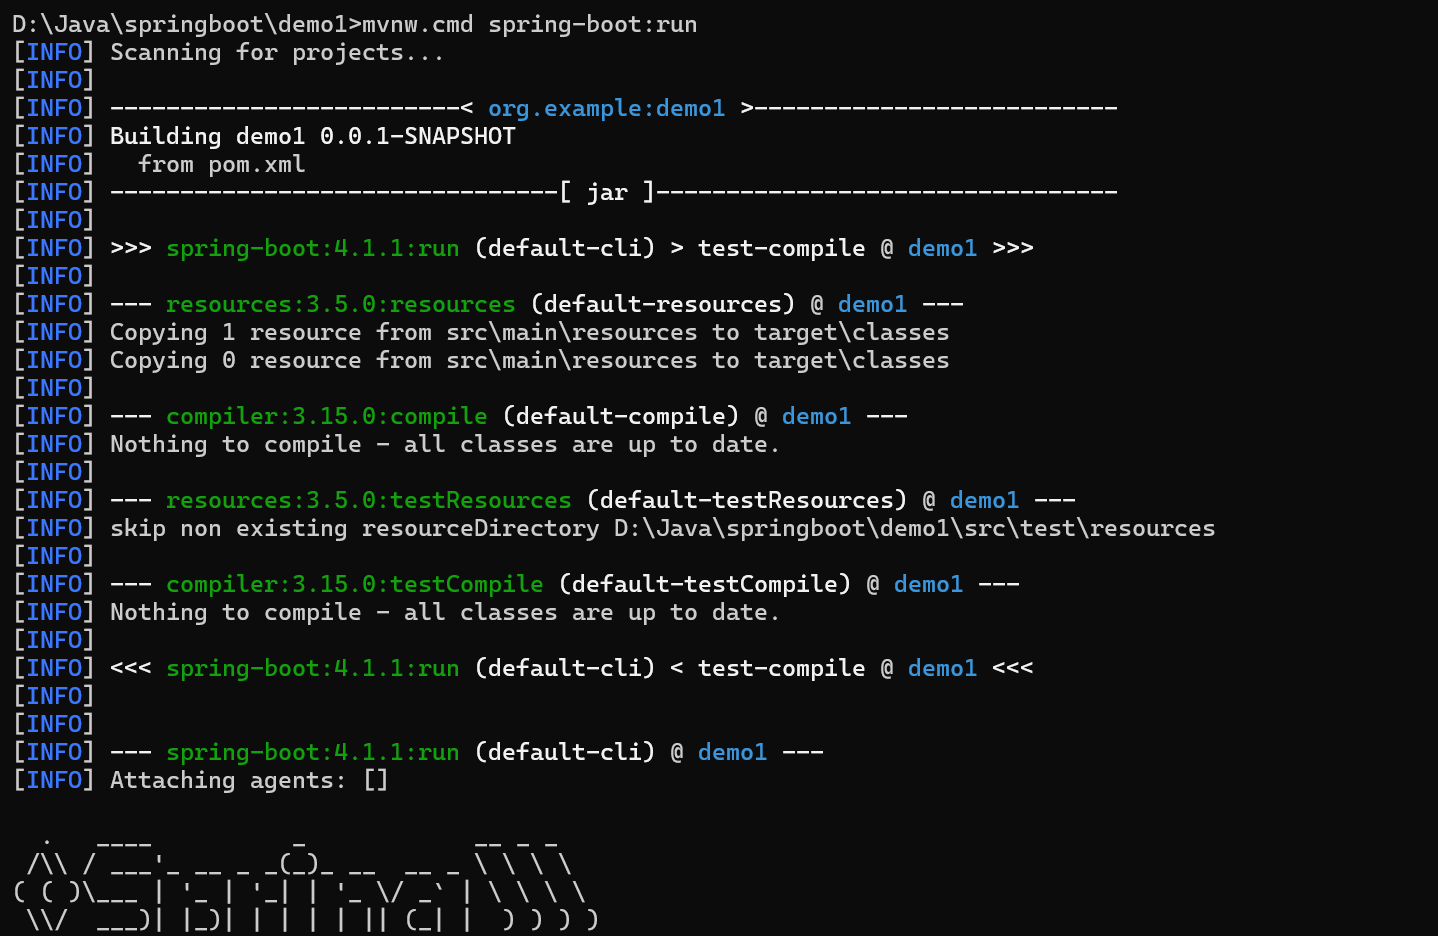
Part 17: Open Spring Boot Application in Browser
Open your web browser.
Enter:
http://localhost:8080Press Enter.
You should see:
Hello, Spring Boot!Your first Spring Boot API is now working.